Bima Bay Muck Diving: Sumbawa’s Critter Bay on Longer Crossings

Lukas Wajong
March 11, 2026
15 min read
Bima Bay muck diving is silty-sand, low-current diving in Sumbawa’s sheltered eastern bay — a Lembeh-style critter habitat that rewards slow, methodical divers hunting cryptic species in 5 to 20 metres of water. It is not the adrenaline diving Komodo is known for. There are no down-currents, no seamount ascents, no "hold your reef hook and wait for the current to flip" briefings. What Bima delivers is something rarer on a Komodo crossing: the kind of muck site where the most interesting thing in a one-metre square of grey sand can keep a photographer occupied for a full tank.
What to Expect at Bima Bay
The bay sits on the northeast coast of Sumbawa, roughly a day’s sailing east of Sangeang volcano on a liveaboard running the Komodo-to-Bali or Komodo-return extended route. The diving happens over silty sand and rubble slopes, mostly in the 5–20 m range. Visibility runs 8–15 m on a good day — nothing like the 25–30 m you see at Crystal Rock on a slack tide — but muck diving is never about visibility. It is about time at depth and eyes trained to spot shapes that don’t belong.
Current is minimal inside the bay. That is the whole point. The same tidal exchanges that charge Castle Rock with grey reef sharks also stir the bottom sediment in more exposed bays, but Bima’s geography shelters the dive sites enough that silt stays settled. You hover at a comfortable 5 cm off the bottom, control your breathing rate down to nothing, and let the site come to you.
The Animals
The headline species at Bima Bay:
- Frogfish — multiple colour morphs, from the hairy frogfish on sponge-encrusted rubble to small painted frogfish sitting motionless on the sand. Guides who know the bay often mark individual fish between dives; a good skipper may have GPS notes on known territories.
- Mimic octopus (Thaumoctopus mimicus) — the silty-sand specialist. Bima’s bottom type is exactly the habitat this species prefers. Watching one flatten, elongate and shift its arm posture to imitate a flatfish, then snap back to normal as it retreats to a burrow is one of those dives that takes a while to fully process.
- Wunderpus (Wunderpus photogenicus) — arguably harder to find than the mimic, and distinctly patterned enough that photographers come specifically for it. Early morning or late afternoon tends to produce better encounters; mid-day the bay is bright and both species tend to burrow.
- Seahorses — short-snouted and thorny seahorse species occur on hydroids and algae patches. Small but stationary enough that anyone who spots one can get a frame count before the dive runs out.
- Harlequin shrimp (Hymenocera picta) — electric pink and white, always found in pairs, nearly always with a sea star somewhere nearby. This is one of the few Komodo-Sumbawa crossing sites where finding them is realistically probable rather than just possible.
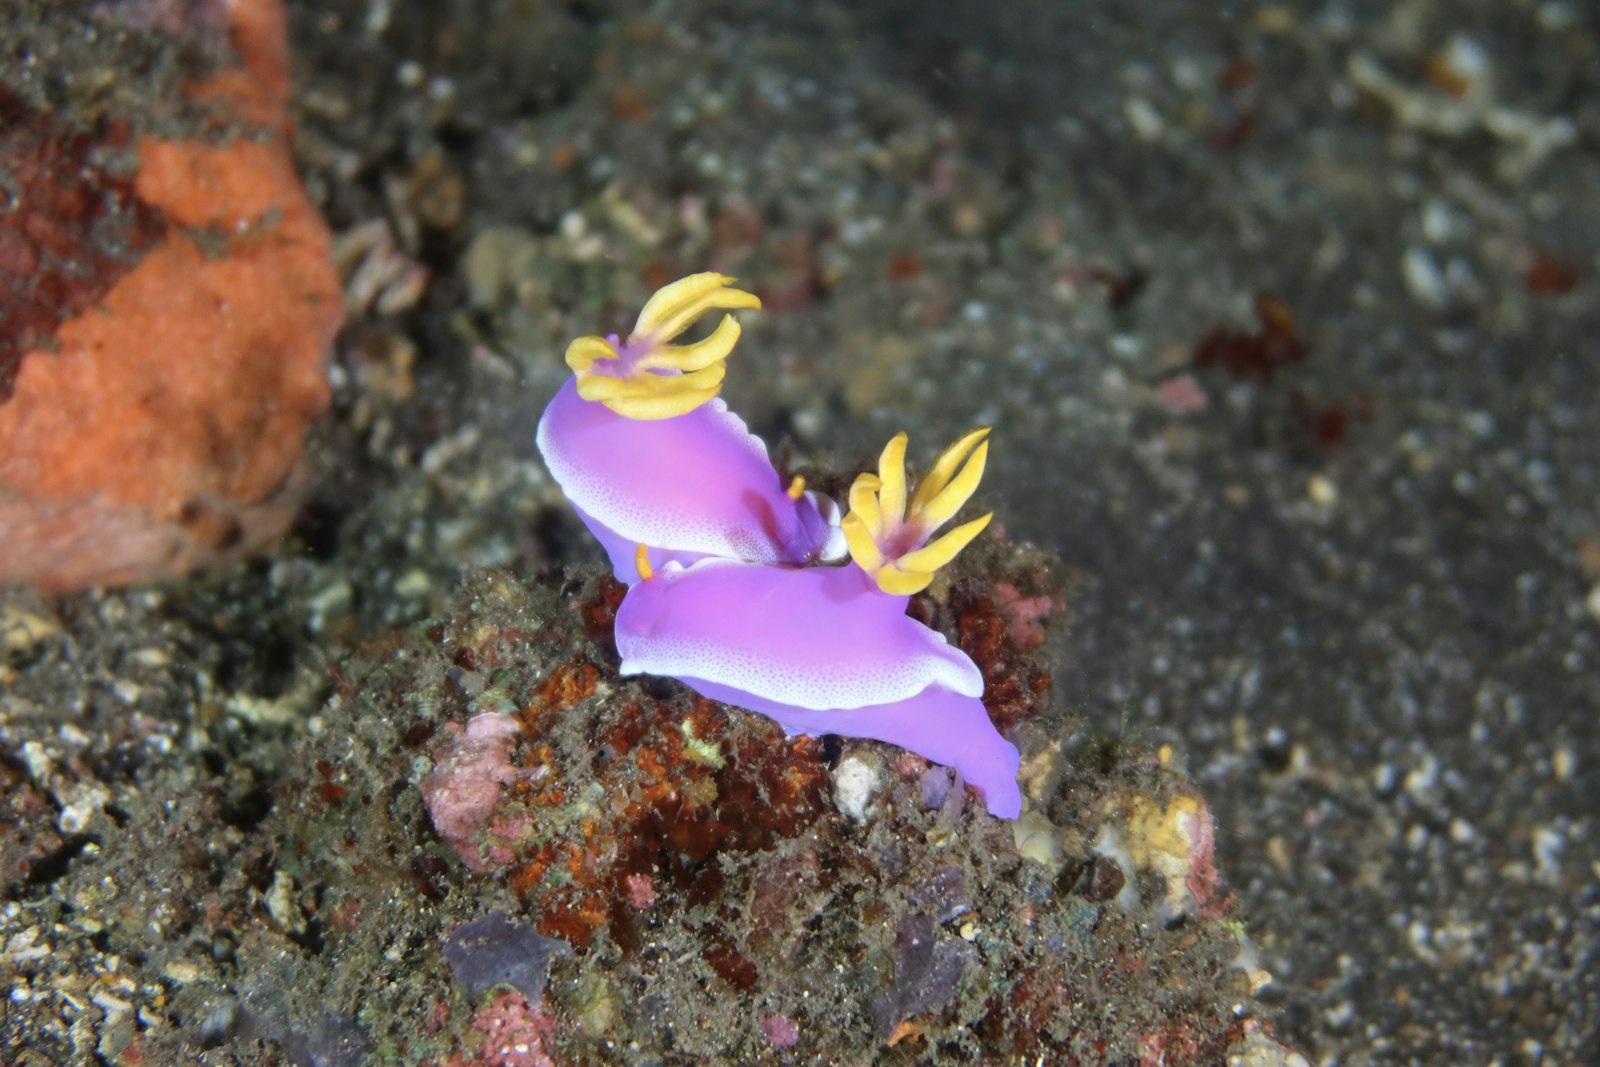
- Nudibranchs — Sumbawa’s silty bays consistently produce high nudibranch species counts. Expect chromodorids, phyllodesmium, and — if conditions are right — the kind of small aeolid you have never encountered before and have to photograph just to identify later.
What you will not find at Bima in significant numbers: pelagics, large reef fish biomass, coral in the condition you see at Tatawa Besar or Batu Bolong. This is the honest trade-off. Divers who come off three days of north Komodo high-current work sometimes struggle to shift gears. Those who make the mental adjustment — and especially those with a macro lens on the camera — leave Bima with their best images of the trip.
Experience Level and Who Suits Bima Bay
Open Water certified divers with 10–15 logged dives upward are comfortable here. The low current and shallow maximum depth keep this site accessible. Good buoyancy is the real requirement — not certification level. If you cannot hold a consistent depth within half a metre over a sandy bottom without kicking up silt, you will ruin the dive for yourself and the divers behind you. Silt suspended in the water column does not clear for 10–15 minutes and it destroys the macro habitat visibility that everyone on the site depends on.
This is, bluntly, a better site for competent Open Water divers with solid buoyancy than for AOW-certified divers who still fin through silt. Certification gates are one measure; buoyancy discipline is another.
Photography Settings for Silt-Slope Muck
A few practical notes if you are diving Bima with a camera:
- Wide angle stays on the boat. Bring a macro port or dioptre.
- Expose for the subject, not the background — the silty grey sand will blow out anyway on anything wider than f/8.
- Strobe position matters more than power. Backscatter on silt is brutal. Arms extended, strobes angled away from the optical axis at 45° or more, reduce power by 1–1.5 stops versus what you would run on a reef dive.
- Shot count is lower than reef dives, not higher. Take time to identify the animal, plan the angle, approach from the side rather than above, and get three or four clean frames rather than spraying 200 and hoping.
- Dive time over depth. Ninety-minute surface intervals between dives at 12–15 m keeps you comfortable across three dives in a day. Ask your guide whether the schedule allows back-to-back dives here — some itineraries do, and a slow second dive at Bima once the light shifts in the afternoon will outperform the midday one.
Muck Diving Etiquette: The Rules Are Simple
No touching. This applies everywhere in Komodo National Park and it applies absolutely at Bima Bay. The animals you are hunting here — frogfish, octopus, seahorses — are often photographed repeatedly by successive diver groups on the same crossing. Stress from repeated human contact changes behaviour, pushes animals into burrows, and eventually drives them off known territories that guides have spent months documenting.
No gloves on the reef wall. Komodo National Park regulations ban gloves anyway; most operators enforce this on all sites. At Bima this is less about the reef and more about the instinct to steady yourself on the bottom — resist it. Kneel on rubble patches if you genuinely need to stabilise, but identify a clear bare-sand spot first and move to it rather than descending wherever you happen to be.
No torches pointed directly at small animals. A flashlight is useful for looking under ledges or into the shadows of sponge structures, but aimed directly at a frogfish, a seahorse or a sleeping octopus it is stressful and causes animals to flee. Light from the side, or use ambient light if it is sufficient for the guide to show you the subject before you set up the shot.
Stay with the group. On a muck site in moderate vis, spreading out means the guide cannot share finds efficiently. This is the site type where a good guide earns their keep — they spot the wunderpus before you do, they know which sponge the frogfish adopted two days ago, they see the pair of harlequin shrimp on a cushion star from 3 metres away. Stay within a body-length or two and watch where they look before they point.
Which Routes Include Bima Bay — and Which Skip It
This is where I want to be direct, because the booking materials for many operators are not.
Bima Bay is a geographical detour from the main Komodo National Park dive sites. It adds roughly a day of sailing, eastward into Sumbawa, to any itinerary that includes it. That is a real cost in a trip budget measured in dive days and fuel. The result is straightforward:
| Trip duration | Typical itinerary scope | Bima Bay included? |
|---|---|---|
| 4–5 days | Central + North Komodo loop, return Labuan Bajo | No — insufficient time |
| 6 days | Full park North + South Komodo, sometimes Gili Banta | Rarely — south Komodo uses available days |
| 7 days | Full park + Gili Banta + Sangeang; some routes reach Bima Bay | Sometimes — itinerary and direction dependent |
| 8–9 days | Full crossing: Komodo + Sangeang + Bima + Saleh Bay / Moyo / Satonda | Yes — standard on most routes |
On 4 and 5-day trips, no operator includes Bima Bay. The arithmetic does not work. You spend the first day checking dive, the last morning heading back, and everything in between covers central and north Komodo — which is already a strong trip. Bima would require two days of sailing to reach and return, consuming the dive budget entirely for transit.
On 6-day trips, south Komodo sites — Manta Alley and the Horseshoe Bay macro sites at Cannibal Rock — tend to absorb any days that might otherwise go east. Occasionally a 6-day itinerary running Labuan Bajo to Bali (one-way, not loop) passes close enough to Sumbawa that Bima gets a single dive, but this is operator and route dependent. Do not book a 6-day trip for Bima Bay specifically.
On 7-day trips, the answer depends on whether the itinerary runs as a loop back to Labuan Bajo or as a one-way crossing. Our 7-day liveaboard page details which routes swing east to Sangeang and Bima. Some 7-day itineraries include Bima Bay; others prioritise south Komodo over Sumbawa. If this site matters to you, ask specifically when enquiring.
On 8 and 9-day crossings, Bima Bay is a standard stop on most routes that push into Sumbawa. It typically appears after Sangeang volcano and before Saleh Bay or Moyo Island, depending on the direction. Our 8–9 day Komodo-Sumbawa liveaboard page covers the standard Sumbawa progression in detail, including what to expect at each site.
One note on flexibility: all these itineraries are weather-dependent. The route from Komodo to Sumbawa crosses the Sape Strait, which can run strong and rough in the peak SE monsoon months (roughly June through August). Most liveaboard operators plan Sumbawa crossings for calmer windows — April–May and September–October tend to work better than July–August. A trip that reaches Bima Bay in April has a more reliable transit than one attempting it in July. This is worth asking your operator about directly when choosing dates.
If you want to plan the right trip for your experience level, preferred sites, and available dates, use our enquiry form or reach us directly on WhatsApp — we can match the itinerary to what you actually want to dive rather than working backwards from a pre-packaged duration.
Bima Bay in Context: Where It Fits in a Sumbawa Crossing
Divers who make the Sumbawa extension typically do three or four distinct site types in sequence. Understanding how Bima fits relative to the others helps set expectations.
Gili Banta GPS Point comes first — the exposed seamount between Komodo and Sumbawa. Strong current, down-current risk, advanced-only diving at the GPS Point itself. If you are not comfortable with negative entries and washing-machine current, the K2 ridge at Gili Banta offers a more forgiving version. Pelagics and reef sharks are the story here.
Sangeang volcano follows. Active geothermal vents, black sand slopes, volcanic bubble streams through coral. Hot Rocks, Bubble Reef and the Bontoh village muck site each offer something different — flamboyant cuttlefish, frogfish, wunderpus, harlequin shrimp on the Bontoh side. Intermediate-friendly and excellent for wide-angle photographers who want something genuinely unusual.
Bima Bay is the macro specialist’s pause in the itinerary. After the physical demand of north Komodo and the visual novelty of Sangeang, Bima is slow and deliberate and rewarding in a different register. On crossings where the guide knows the site well, this is often the diver favourite when the images come back.
Saleh Bay and Moyo Island close the Sumbawa leg on longer trips. Saleh Bay is known for whale shark encounters at the traditional bagan fishing platforms — not a dive, but a snorkel encounter that gets mentioned in crossing trip reports consistently. Moyo’s Angel Reef is a pretty, relaxed sloping reef, often used as a first or final dive of the crossing. Good coral, fish schools, turtles, accessible to all levels.
The full progression over 8–9 days gives you something that no shorter Komodo trip can: the full spectrum from high-octane current diving to slow muck work to pelagic encounters in a single itinerary. Each site type produces different photos, demands different skills, and rewards different priorities. That variety is the argument for spending a week-plus on a Komodo crossing rather than tacking on one extra day.
Practical Notes for Planning
Bima Bay dives are typically conducted mid-trip, after Sangeang and before the final push west or south. This means you will have done several days of diving already, including the high-energy north Komodo sites if the itinerary runs north-to-south before crossing. Nitrogen loading is real. Use your dive computer conservatively, take your surface intervals seriously, and resist the pressure to cram in a fourth dive on any day where you are already deep into your plan.
Water temperature at Bima Bay runs warm — typically 27–29°C in the bay, consistent with north and central Sumbawa coastal temps. A 3 mm wetsuit is sufficient for most divers. Unlike south Komodo’s Horseshoe Bay, where upwelling cold water pushes temperatures down to 20–24°C and a 5–7 mm suit is sensible, Bima stays comfortable in a thin suit. This makes back-to-back dives here physically manageable in a way that south Komodo sites are not for everyone.
Park fees apply at Bima Bay. Sumbawa lies outside Komodo National Park proper, but government marine conservation area fees apply to diving in Indonesian protected marine zones. Your operator will handle fee logistics as part of the liveaboard arrangement — confirm in advance what is included in the quoted price and what is collected separately. On a full Sumbawa crossing, fee totals accumulate quickly across multiple zones, so a clear itemisation before departure avoids surprises.
Nitrox makes sense here. The dives are shallow enough that enriched air extends bottom time usefully, and on a liveaboard running 3–4 dives per day over several days, the cumulative nitrogen management benefit is genuine. Most mid-range and upscale liveaboards include nitrox or offer it as an add-on. If your boat carries it, use it at Bima.
If the critter-hunting side of this region interests you and you want to know which specific itinerary gives you the best shot at Bima Bay in the right season, send us your dates and experience level via our enquiry form or WhatsApp. We will give you a straight answer on which boats and routes make sense, including an honest read on whether the crossing is realistic for your timeframe.
Frequently Asked Questions
What certification do I need for Bima Bay muck diving?
Open Water certification is sufficient for Bima Bay. The sites run 5–20 m with minimal current, placing them within standard Open Water depth range. What matters more than the certification card is buoyancy control. Divers who kick up silt negatively affect the experience for everyone in the group. If you have been out of the water for more than a year, consider a refresher before a liveaboard trip — Bima Bay will reward the preparation.
Is Bima Bay included on all Komodo liveaboard trips?
No. Bima Bay is typically included on 7–9 day itineraries that extend into Sumbawa, and reliably on 8–9 day crossings. Most 4–6 day trips do not reach it — the sailing distance from Komodo National Park sites adds at least a full day of transit each way. If Bima Bay is a priority for you, book a trip of at least 7 days and confirm the specific route when enquiring.
What is the best season to dive Bima Bay?
April through May and September through October generally offer the most manageable Sape Strait crossings to reach Sumbawa. July–August is peak dive season in north Komodo but can produce rough conditions on the Komodo-to-Sumbawa crossing due to SE monsoon swell. The muck habitat at Bima Bay itself is year-round — the critters do not have a season. The practical limit is whether the boat can make the transit comfortably.
Can I combine Bima Bay with south Komodo sites like Cannibal Rock?
Yes, on 8–9 day itineraries it is common to include both. A typical route might cover central Komodo, then south Komodo (Manta Alley, Cannibal Rock, Horseshoe Bay), then cross north through Gili Banta, Sangeang, Bima Bay, and Saleh Bay before ending the trip. The two site types — cold-water south Komodo macro and warm-water Sumbawa muck — complement each other well. Check whether your operator runs south Komodo in a direction that makes the Sumbawa extension logical rather than an add-on that requires backtracking.
How does Bima Bay compare to Sangeang’s Bontoh muck site?
Both are sandy muck sites with similar species overlap — frogfish, wunderpus, mimic octopus, harlequin shrimp, nudibranchs. The key difference is substrate and temperature. Sangeang’s Bontoh site is black volcanic sand with occasional warm geothermal patches and the ever-present sense that you are diving adjacent to an active volcano. Bima is neutral grey-brown silt, calmer, warmer, more sheltered. Photographers who do both in the same crossing tend to describe Sangeang as the more dramatic setting and Bima as the more productive per-dive critter count. Neither claim is universal — it depends heavily on conditions and guide knowledge of that particular site on that particular day.